React Social Login Tutorial: Google, Facebook & Twitter OAuth2
All social media giants like Facebook, Google and Twitter have tons of user data.
It’s convenient for users to just ‘Continue with Google’ rather than entering all their details. It’s also great for developers because we don’t have to do the weird “email verification” thing.
How do we implement the “Social Logins” feature in react? Well, that’s what this article is all about.
I just want to let you know that this tutorial is for React (frontend) only. It only shows how to authenticate just from the client.
Getting started with React Social Login
Let’s start by creating a new react project.
I recommend using the Visual Studio Code editor. My NodeJS version is 12 as of this tutorial.
So I’ve created a folder on the desktop and opened vscode it in it. Type the following command in the terminal.
npx create-react-app .This will take a couple of minutes to install all the dependencies and set up a basic react dev environment.
First of all, let’s get Client/App credentials
To use services from Google, Facebook and Twitter, we need to get the respective client id from each.
#1 From Google - The Client ID
- Go to https://console.developers.google.com/.
- Create an app, with basic info.
- After creating the app select it and go to the ‘credentials’ page from the sidebar.
- In the OAuth 2.0 Client IDs, section. create a client ID.
- Make sure to add ‘http://localhost:3000’ (or whatever you’re working with) to authorized origins.
- Once you’re done, note down the Client ID.
Here’s a link to the detailed guide from google.
#2 From Facebook - The App ID
- Go to https://developers.facebook.com
- Create a Facebook developer account (by clicking ‘Getting Started’) if you already don’t have one.
- Create a new app in the ‘My Applications’ section.
- Add basic info and fulfill all the requirements.
- Click add a product and click setup in the Facebook Login card.
- Select the Web Platform.
- Make sure to enter ‘http://localhost:3000’ (or whatever you’re working with) to URL fields.
- Note the App ID.
Here’s the link to a detailed guide from Facebook.
#3 From Twitter - Consumer Key & Secret
- Visit https://developer.twitter.com/en/apps. Please note that you must have an approved developer account.
- Make an app. Fill out appropriate fields like name, description, and important website.
- Just make sure to enter ‘http://localhost:3000’ (or whatever) to URL fields.
- Callback URL is an important field, remember to fill it wisely.
- Note down Consumer Key (API Key) and Consumer Secret (API Secret).
Now that we’ve got all credentials, let’s proceed with the actual work.
Step 0: Setting up the React App
- Clean up by deleting the logo.svg, index.css and remove their references from index.js and App.js.
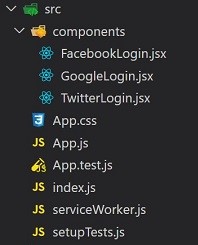
- Create a new folder in /src, call it ‘components’.
- Create 3 new files in it.
- GoogleLogin.jsx
- FacebookLogin.jsx
- TwitterLogin.jsx
Now we’ll be editing each of those 3 files one by one.
Step 1: The Google Login
Install the popular package react-google-login by pasting the below in terminal.
npm i react-google-loginNow in GoogleLogin.jsx put the following content.
import React from "react";
import ReactGoogleLogin from "react-google-login";
export default function GoogleLogin(props) {
  const onResponse = (resp) => {
    console.log(resp);
  };
  return (
    <ReactGoogleLogin
      clientId="<Your Client ID Here>" // We created this earlier, remember?
      buttonText="Login with Google"
      onSuccess={onResponse}
      onFailure={onResponse}
    />
  );
}
Make sure to import components/GoogleLogin.jsx in the App.js file.
import React from "react";
import "./App.css";
import GoogleLogin from "./components/GoogleLogin";
function App() {
  return (
    <div className="App">
      <GoogleLogin />
    </div>
  );
}
export default App;
The package react-google-login is so awesome, that it also creates a good looking button for us too.

Now let’s see what onResponse function logs in the console. You should see something like this on success.
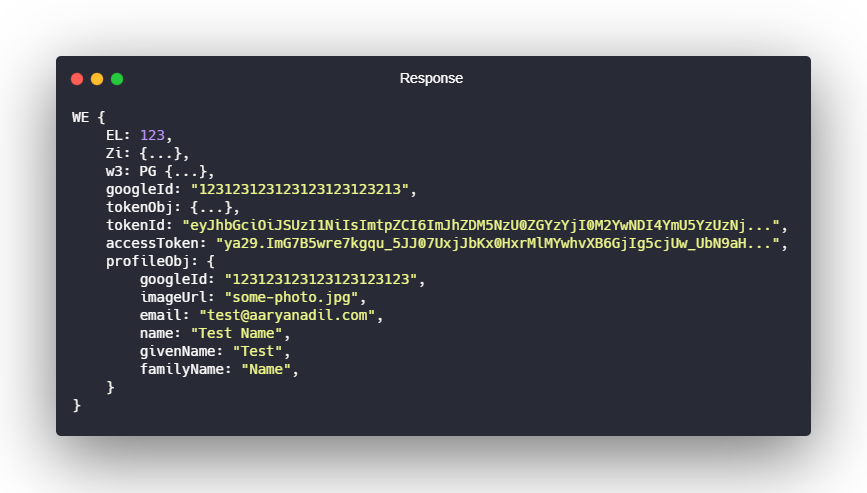
You can use this info however you want in your application.
Step 2: The Facebook Login
Another popular package for handling Facebook authentication with react is react-facebook-login. Install it using the following command in the terminal.
npm i react-facebook-loginLet’s edit the /src/components/FacebookLogin.jsx file.
import React from "react";
import ReactFacebookLogin from "react-facebook-login";
export default function FacebookLogin(props) {
  const onResponse = (resp) => {
    console.log(resp);
  };
  return (
    <ReactFacebookLogin
      appId="<Your App ID>" // we created this, remember?
      autoLoad={true}
      fields="name,email,picture"
      callback={onResponse}
      onFailure={onResponse}
    />
  );
}
Now we should import this file in App.js as well and render it. App.js would look something like.
import React from "react";
import "./App.css";
import GoogleLogin from "./components/GoogleLogin";
import FacebookLogin from "./components/FacebookLogin";

function App() {
  return (
    <div className="App">
      <div style={{ marginBottom: "1rem" }}>
        <GoogleLogin />
      </div>
      <div>
        <FacebookLogin />
      </div>
    </div>
  );
}

export default App;
It should render the “Login with Facebook” button like the following.

It seems like, you’ll be needing https (SSL) to work with client-side Facebook authentication.
Step 3: The Twitter Login
react-twitter-login is the package for handling Twitter Authentication in React.
npm i react-twitter-loginLet’s edit /src/components/TwitterLogin.jsx file for the following contents.
import React from "react";
import ReactTwitterLogin from "react-twitter-login";
export default function TwitterLogin() {
  const authHandler = (error, data) => {
    if (error) return console.error(error);
    console.log(data);
  };
  return (
    <ReactTwitterLogin
      authCallback={authHandler}
      consumerKey="<Consumer Key>" // We created this, remember?
      consumerSecret="<Consumer Secret>" // We created this, remember?
      callbackUrl="<Callback URL>" // You set this up in the twitter app settings, remember?
    />
  );
}
Update the App.js file to render this as well.
import React from "react";
import "./App.css";
import GoogleLogin from "./components/GoogleLogin";
import FacebookLogin from "./components/FacebookLogin";
import TwitterLogin from "./components/TwitterLogin";

function App() {
  return (
    <div className="App">
      <div style={{ marginBottom: "1rem" }}>
        <GoogleLogin />
      </div>
      <div style={{ marginBottom: "1rem" }}>
        <FacebookLogin />
      </div>
      <div>
        <TwitterLogin />
      </div>
    </div>
  );
}

export default App;
This should render the twitter button as well. It looks nice.

Final Step: Finishing up
We didn’t do much with the response data. That wasn’t the goal of this tutorial anyway. Here are a few things you can try.
- Save the profile data in a particular state (or even better with a context).
- Use the data to provide some user-specific functionality.
- Add a logout functionality.
- Add proper error handling.
I guess that’s it for this article. Please let me know if I missed something? Did this tutorial work for you?